
InfoSec Write-ups – Medium–
Beginners Guide part 1

The following is a guide to help you get around your firewall and create the basics, which are Interfaces, firewall address objects, static routes and policies
So, you have your FortiGate firewall almost set up, what’s next?
You can do a lot with this NGFW firewall, from Simple Rules, Web filtering, Deep SSL inspection of the traffic, IPsec tunnels, custom IPS signatures, even using it as a web application firewall

We will look at the different capabilities, using screenshots from my home FortiGate https://amzn.to/3dyzysK but let’s start with beginners guide to one of the basic things you do when you connect through the administrative interface and that is:
- Set admin profile
- Set up new interfaces for your LAN
- Config firewall address objects, for users, machines, anything in your LAN, that you may need to address
- Configure default static route that will allow anyone to get out to the internet through your WAN port
- Configure your first policy

We will configure the above using the Graphical user interface, but we will focus on the command line, which is the best way to get into the advanced stuff.

Once you are connected to your FortiGate for the first time ( though one of the ports ), you are actually the Administrator of the machine, you have all the root privileges and you can do just about anything from assigning new administrators or configuring your FortiGate firewall without any limitations

In system- administrators, you can select the admin profile ( super admin or professional ) 2-factor authentication, trusted hosts ( IP addresses ) that you can connect from and more
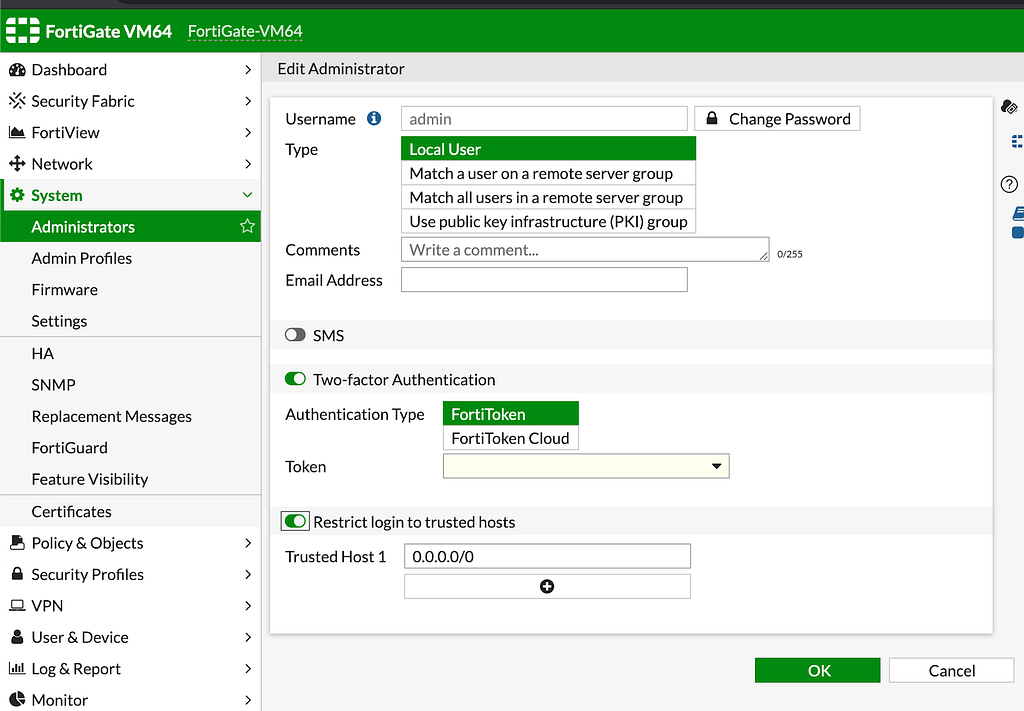
A FortiGate administrator is atopic by itself, but we will not get into it , in this article, let’s start with our LAN configuration
Configuring a new LAN interface
You can configure your LAN interface using the graphical user interface, which is quite intuitive, we will do it using the command line
For the sake of this article, we will assume that:
- Our FortiGate management interface is at port 3 with the 10.0.5.1 address
- Our FortiGate is connected to a VDSL router, through port 1, it will be our WAN interface
- Our new LAN will be at port 10, at the 10.0.7.0 subnet, so so that anyone connected to port 10 of your FortiGate , will be part of that LAN and will get an IP address from its an internal DHCP server that we will set

Creating a LAN is easy, click on the interface of your choice ( in our case it is port 10 ), you will enter the interface configuration page
Name your interface using the Alias field ( very important )
The second thing is the role, you have 4 options, for now, use the LAN option, we will look at other options in another article

At the address field , choose your LAN gateway ip address , you can choose to get one from a DHCP server, but will set it in a static ( manual ) way
From here , you can configure the administrative tools that will allow you to connect to that interface, either https , ssh …

Note — there are tons of things that you configure on your interface, but we will focus on the most basic and fundamental
Your LAN will lease ip addresses to all members of the subnet, so we will set a DHCP server , by enabling it
You can control the amount of ip addresses , bare in mind , that you don’t necessarily need to have 254 addresses available, if your LAN has only 15 employees , use 30 or 40 addresses

From there, if you enable the advanced options, you will have more options , as using a DHCP relay , that id if you don’t want to use the interface DHCP server, you can configure , additional DHCP options ( as in the case where you will want to send your clients, a wi-fi controller ip address, or maybe a Log server
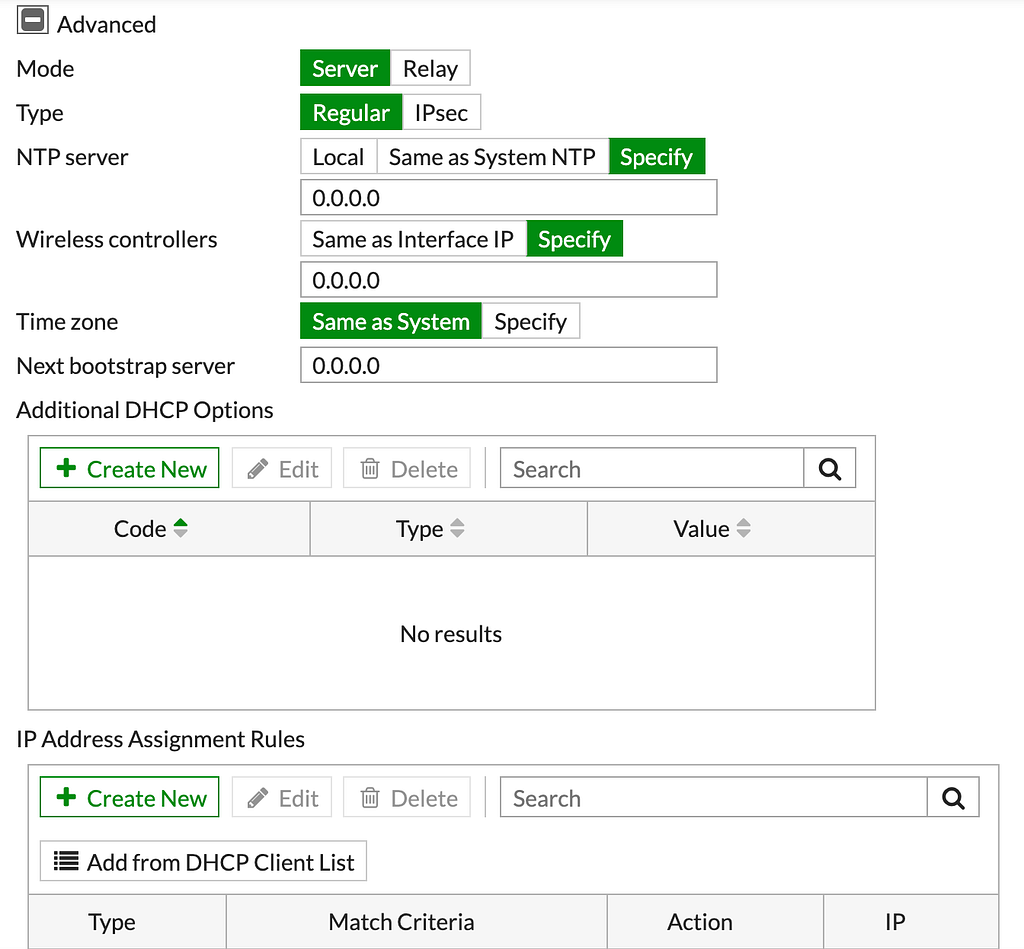
DHCP configuration also includes, the ability to assign or reserve IP addresses to specific MAC address, or to block MAC addresses from getting ip addresses

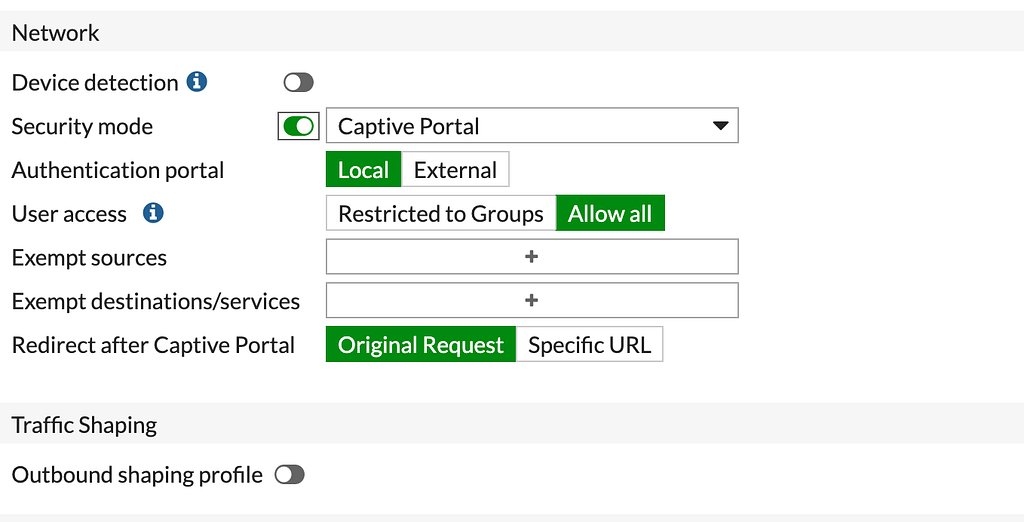
Following our DHCP server Configuration we can enable several more features, one of them is device detection and enable a captive portal authentication for the employees or a specific group of employees ( good for outsource employees )
Creating firewall address objects
Your firewall rules , will require you to recognise specific devices in your LAN , using ip address, geographic location( in the case that we will want to block geo- address as destinations ) and more .
So if for example , we have in our LAN a device , such as a NAS ( network attached storage ) that we will want to open specific rules, only for him , it would be much more convenient to use an address object
To configure our address object in our LAN , we will use the command line, remember that:
- Our NAS belongs to the 10.0.7.0/24 subnet
- It is connected through port 10
- It has the 10.0.7.11 address
To get into the command line , you will click on the CLI symbol ( a javascript applet ) at the top right side of the page which will open the command line

From here we will type the following

We have created a new object using the “ config firewall address “ command
Named it “NAS”
Associate it with relevant interface ( port 10 )
And assigned an ip address
That is all, for our first basic fortigate configuration guide “ our next article we will look at static route and policies
Basic Fortigate Firewall Configuration was originally published in InfoSec Write-ups on Medium, where people are continuing the conversation by highlighting and responding to this story.
