
InfoSec Write-ups – Medium–
( Beginners Guide part 2)

In the first part of our “Fortigate basic configuration guide”, we looked at administrator set up, interface configuration with DHCP service running that will lease ip addresses to your clients, and finally, we have configured a firewall address object for a specific device on our subnet, My Mac book.
We needed to create a firewall address object so that we could, later on, point specifically to that device on our subnet
Now it is time to let traffic from our interface get out to the internet with the static route and our first policy
Static Route

Routing is a destination decision making in other words, it is the thing that controls how packets are sent along the path from source to destination. Routing is an osi layer 3 decision, and network devices that belong to that class are known as Routers. Your FortiGate firewall, is not only a next-generation firewall, but it is also a router
Network devices that perform routing, contain a routing table, which helps them to specify the next hop for a packet, using rules. your FortiGate does routing lookups every time it needs to route packets
To see your FortiGate routing table, open the command line and type:
Get router info routing-table database

This command will show you all the routes at your fortigate, including those that are in active
Static route is Probably the most used route in a fortigate firewall ,It is manually configured and network experts, will always tell you , that you can do just about any route using static route, although you have dynamic routes , ( OSPF…) which are much more sophisticated
So in our topology we have the LAN which is at the 10.0.7.0/24 subnet, we also have our WAN interface which is connected to our router at the 10.0.3.55
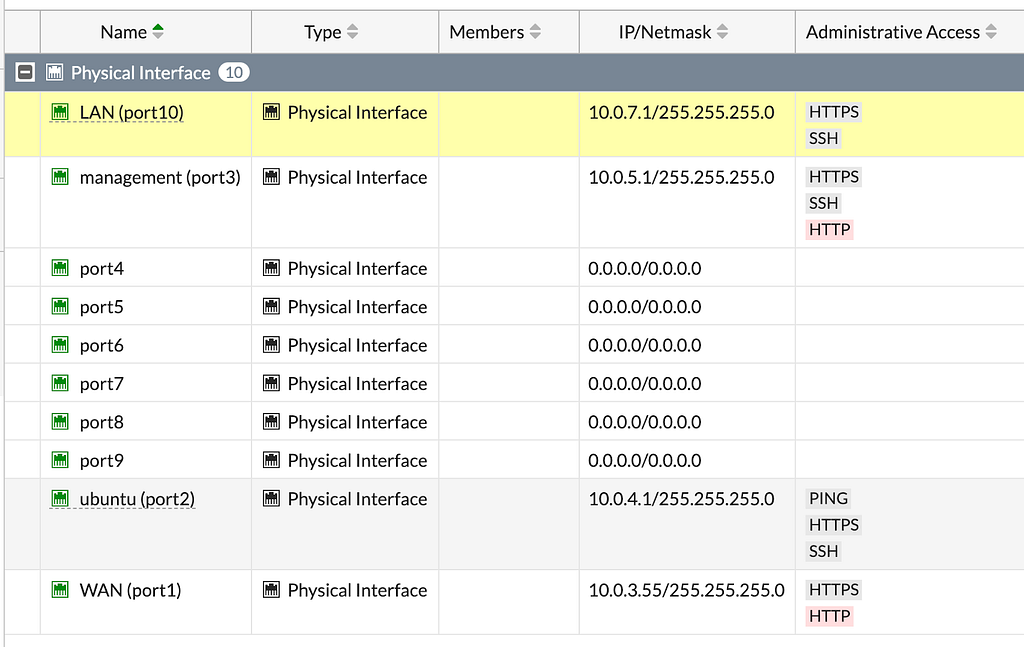
We need to tell our fortigate “ if you see a packet that is coming from the 10.0.7.0 subnet , send it through our WAN interface ( the 10.0.3.55) towards our router “
Our static route, we be a default route, that is the same route, that youtube whenever you connect in your home to your ISP router, which means that any packet that does not have a specific route in your routing table , will be forwarded to the default route ( your router ISP ) as the default Hop
Default route is written in that way 0.0.0.0./0.0.0.0 , so let’s configure that in our fortigate
Head to Network — static route

And in static route create new static route , the following screen will appear

Static routes ( as dynamic routes ) have different attributes, that determine if they are Active or Not, Preferred more or Less, static route attributes are Distance and Priority ( available in the advanced options ) , we will not get to this, in this article , so keep the administrative distance to 10, that is the default setting
- In destination , we will keep the 0.0.0.0/0.0.0.0 which is the default route
- In interface we will choose the interface connected to our WAN , which is port 1
- And in gateway address , we will enter, our router GW IP which is connected to our fortigate, in my case, it is 10.0.3.1

So , we have a default route that sends packets to our WAN interface , towards our ISP router.
Policy
Alright, we have our interface all set up, our firewall address object and now we also have a static route , that will let packet flow towards the ISP router on their way to the internet
What is missing? A Policy Of Course
You should think of policy as “Traffic matching”, that is , you define a rule that will allow or deny traffic, assuming that it finds a match , once it finds match ( that is your policy ) , that are a set of things, it can do with that traffic , allow or deny it, save logs, do a network address translation, apply a security policy and more
There are different types of policies in your fortigate, we will look at the most popular one and that is IPV4 policies
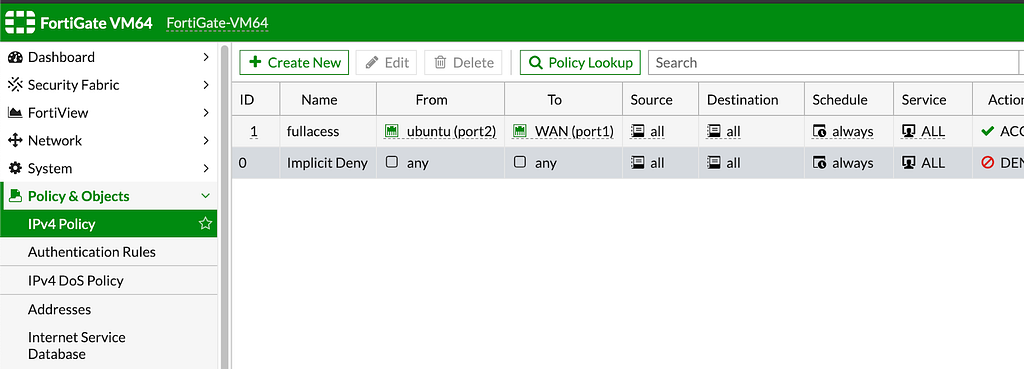
So , go to policies and objects ( you probably guessed it 🙂 , on your left Pane
Create new Policy, and you will see the following screen
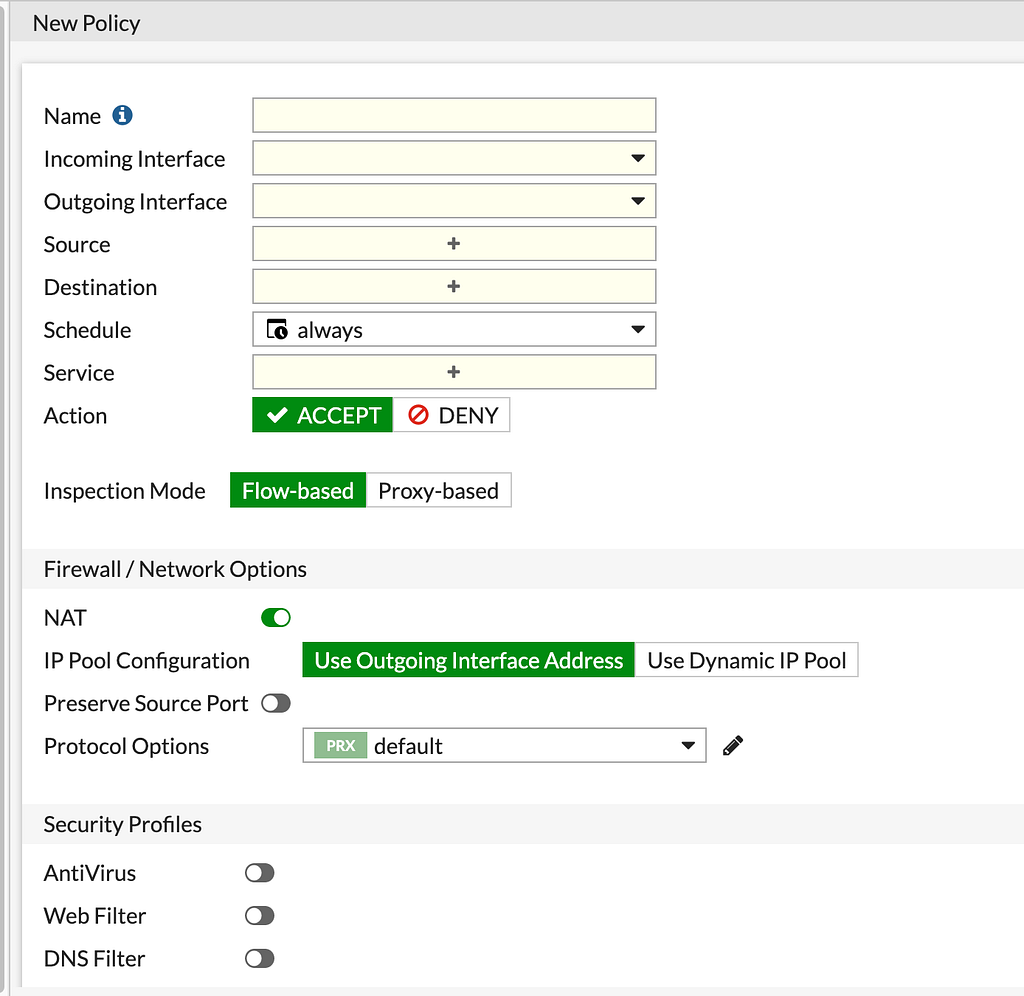
We have said that a policy checks for traffic matching
Your traffic has different attributes to it ( source, destination, protocol that it is using, the time of day…), so lets fill in the missing details
Name your Policy
Incoming interface is our LAN Subnet ( which is at port 10 )
Outgoing interface is our WAN interface ( port 1 )
Source — currently choose any one , but then again , we can also choose, specific devices based on the firewall address objects we created as My loved Mac https://amzn.to/2HbU0Ua

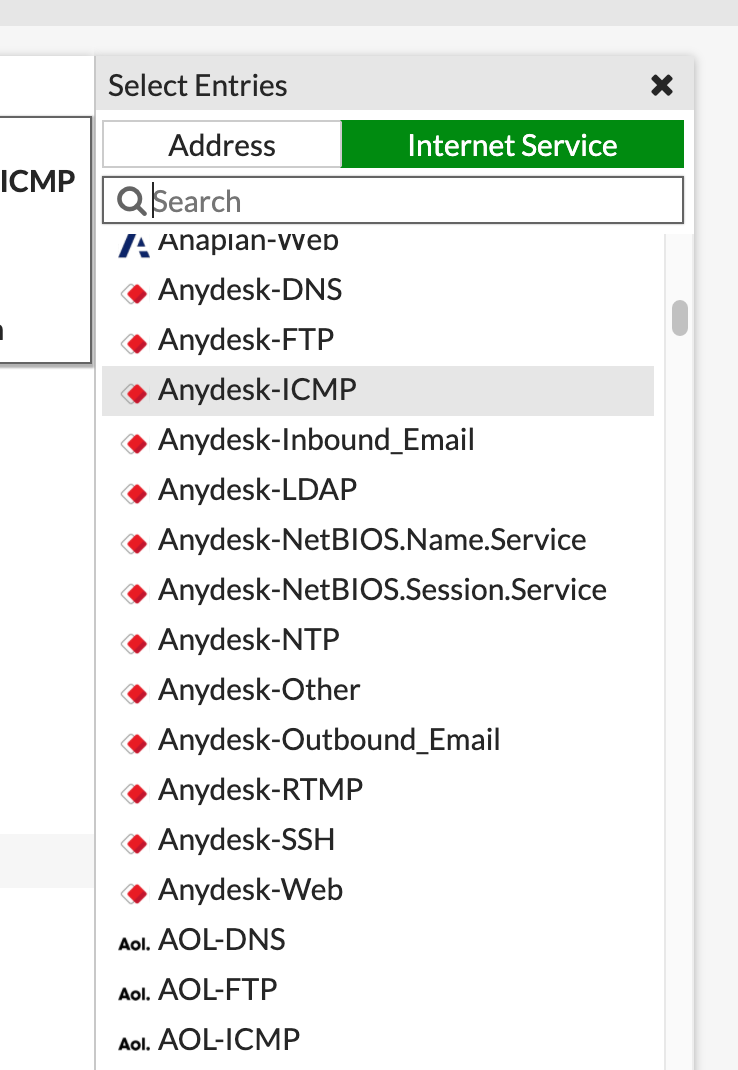
Destination — again choose all, but you can also limit the destinations to be more specific as well known internet services
Schedule — you can set your policy to work 24 hours or in different days, in specific hours , as in the case where you need your specific device to backup your hosts
Service — which protocol ? will you allow only https and dns or any protocol out there, be granular , so your policies , will not become your back door
And the last thing is the ACTION, will allow or deny the traffic based on the different matches
Your policy, should look something like that

You will see that underneath the matching fields , you can set more criterias such as the inspection type ( Flow or Proxy ) , NAT, Security profiles , Logging and more , but this will have to wait for another article
Basic Fortigate Firewall Configuration was originally published in InfoSec Write-ups on Medium, where people are continuing the conversation by highlighting and responding to this story.
